Leave Your Message

How to Choose a Leather Weightlifting Belt in 2026?

Choosing a leather weightlifting belt in 2026 requires more than comparing thickness, color, and price. A belt should support heavy bracing without restricting breathing or changing your lifting position. It must also match your training style, body shape, and experience level.

The ACSM Worldwide Survey of Fitness Trends 2025 continues to recognize strength training as a major fitness activity. Meanwhile, the Health & Fitness Association’s 2024 global report estimates that fitness facilities served more than 180 million members worldwide in 2023. These figures suggest stronger demand for durable training equipment, including belts used in squats, deadlifts, and presses. Yet, industry reports rarely separate leather belts from nylon or synthetic models. That limitation matters.

A reliable Leather Belt Weightlifting guide should examine leather grade, belt width, thickness, stitching, buckle design, and adjustment range. A stiff 10-millimeter belt may suit many intermediate lifters, while a thicker model can feel excessive during higher-repetition work. Fit comes first. The belt should sit firmly around the torso, not painfully against the ribs or hips. Try it with your actual lifting clothes.

Small details reveal quality. Look for clean edge finishing, reinforced holes, strong rivets, and a buckle that closes without forcing your wrist. Independent testing remains limited, so marketing claims deserve careful questioning. Some belts feel powerful on the first day but soften unevenly after months of sweat and repeated loading. This guide compares practical evidence, manufacturer specifications, and user-focused durability concerns. It also admits where the evidence is imperfect. That honesty helps lifters choose a belt for real training, not just attractive product photographs.
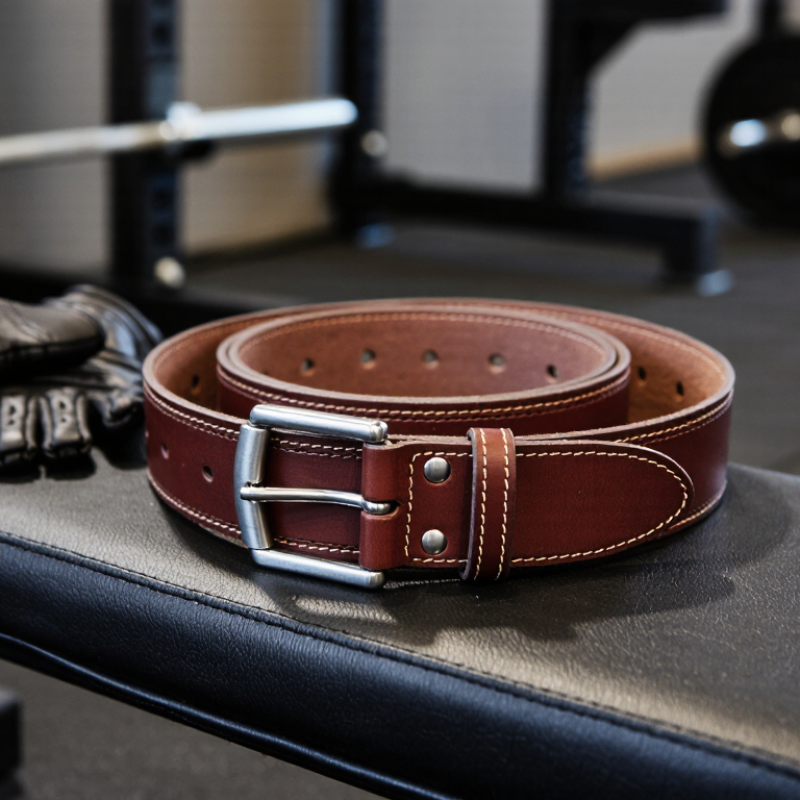
How to Choose a Leather Weightlifting Belt in 2026?

What Is a Leather Weightlifting Belt and How Does It Work?

A leather weightlifting belt is a firm strap worn around the abdomen during heavy squats, deadlifts, and presses. It does not hold the spine like a rigid brace. Instead, it gives the abdominal wall something to push against. That pressure can improve trunk stiffness and help lifters maintain position under load.

Research by Miyamoto and colleagues found that a lifting belt increased intra-abdominal pressure by about 25% during heavy lifting. Studies published in the Journal of Strength and Conditioning Research also reported changes in trunk muscle activity and lifting mechanics. These results are useful, but they are not universal. Technique, breathing, belt width, and training experience can alter the response.

Leather usually feels firm, stable, and less flexible than synthetic material. A suitable belt should sit above the hip bones without pressing into the ribs. Leave enough room to brace fully. Too loose, and it offers little feedback. Too tight, and breathing becomes awkward. A simple test works: brace, breathe behind the belt, and perform a controlled bodyweight squat. If the belt pinches or forces your ribs upward, the fit needs reconsideration. Leather also softens over time, so an initially stiff belt may feel different after several weeks. It is equipment, not a substitute for bracing practice.

Which Leather Belt Thickness and Width Match Your Training Goals?

Choosing a leather weightlifting belt starts with thickness and width, not appearance. A 10 mm belt offers firm support while allowing easier movement. It suits general strength training, repeated squats, and moderate deadlifts. A 13 mm belt feels more rigid and stable under heavier loads. However, it may restrict your breathing and bracing if your technique is still developing.

Width should match your training goals and torso shape. A four-inch belt provides strong abdominal support for squats and deadlifts. Shorter athletes may find it uncomfortable near the ribs or hips. A tapered design can improve movement during cleans, pulls, and other exercises requiring a deeper position. Measure your waist where the belt will sit, rather than trusting your trouser size. I once chose a belt that was too wide, and the pressure distracted me throughout every set. That mistake changed my fitting process.

Tips: Choose 10 mm for balanced support and comfort. Choose 13 mm for serious heavy lifting. Check the belt while bracing, bending, and sitting. It should feel secure, not painful. Leave enough room for one firm breath. Leather also needs gradual breaking in. A stiff belt can feel impressive, but comfort determines whether you use it consistently. Coaches and experienced lifters often recommend testing the belt with lighter sets before adding maximum loads. My preference has changed over time; more thickness is not always better.

How to Choose the Right Belt Size, Shape, and Closure System

A leather weightlifting belt should match your body, movement, and training style. ACSM’s 2024 Worldwide Survey ranked traditional strength training among the five leading global fitness trends. That growth makes correct belt selection more important, not less. Measure around your abdomen where the belt will sit, usually near the navel. Keep the tape firm, but do not compress your stomach. Select a size whose middle range matches your measurement. Avoid buying the largest possible size.

Shape affects comfort and bracing. A tapered belt can leave more room for hip movement during squats or pulls. A wider, equal-width belt may provide steadier abdominal contact during heavy, controlled lifts. Neither shape is universally superior. Your torso length matters. A tall athlete may tolerate a wider profile, while a shorter torso can feel pinched. Try the movement before judging it. Fit is practical, not fashionable.

Closure choice changes adjustment speed. A single-prong system is simple and easy to fine-tune between sets. A lever-style system offers fast locking, but installation and adjustment can be less convenient. A double-prong design may feel secure, though it often takes longer to fasten. WHO guidelines recommend muscle-strengthening activity on at least two days weekly, yet frequent training can expose poor fit quickly. I still measure twice after hard sessions because waist size shifts. That detail is easy to miss. The belt should support bracing, never replace technique, breathing control, or coaching.

How to Choose a Leather Weightlifting Belt in 2026?

Choose the right belt by comparing its shape, back width, front width, and closure system.

Size

Measure around the abdomen where the belt will sit, then select a size whose adjustment range places your measurement near the middle.

Shape

A straight 10 cm belt offers consistent support. A tapered belt usually provides more hip and torso comfort during Olympic lifts.

Closure

Prong closures are simple and adjustable, lever closures are fast and rigid, while Velcro systems are lightweight and quick to release.

Reference dimensions show common leather belt designs. Competition rules may limit belt width to 10 cm and thickness to 13 mm, so always check the rules of your federation before purchasing.

What Leather Quality and Construction Features Should You Check?

When choosing a leather weightlifting belt in 2026, inspect the leather before trusting its appearance. Full-grain leather usually keeps its natural fibers and resists stretching better than corrected leather. However, “full-grain” alone proves little. Check the hide’s thickness, surface consistency, and firmness along the entire belt. A soft center with stiff edges may indicate uneven construction.

Run your fingers across the leather. It should feel dense, not plastic-coated or strangely glossy. Look for clean, tight stitching around the edges, especially near the buckle and adjustment holes. Reinforced stitching should hold its shape when the belt is pulled firmly. Solid metal hardware also matters. The buckle should sit flat, while rivets must show no movement or sharp gaps.

Test the belt under controlled tension before heavy training. Bend it gently and notice whether it returns slowly without cracking. A strong belt still needs limited flexibility. Excessive stiffness can press painfully into the ribs during squats. I once chose a thick belt that looked impressive but bruised my hips after several sessions. That mistake taught me to judge comfort during movement, not by thickness alone. Check the inner surface for rough fibers, loose threads, and poorly finished edges. Sweat and repeated bending expose weak construction quickly. Leather quality varies. Inspect every detail.

How to Test Fit, Maintain, and Replace Your Weightlifting Belt

A leather weightlifting belt should feel firm, not restrictive. During a heavy squat, test it with two fingers between the belt and your abdomen. You should brace fully without feeling numbness, pinching, or pressure on your ribs. The American College of Sports Medicine recommends individualizing resistance-training equipment, while research published in Medicine & Science in Sports & Exercise found that belts can increase intra-abdominal pressure during demanding lifts. That support is useful, but it does not replace sound bracing technique.

Test the belt under realistic conditions. Wear your normal training shirt, brace, squat, and hinge. If the buckle shifts, the leather folds sharply, or your breathing becomes shallow, the fit needs attention. Wipe sweat away after each session, then let the belt dry at room temperature. Avoid radiators and soaking. Leather conditioner can help, but too much may soften the support. I once assumed a glossy belt was healthier; it was only over-conditioned. That mistake matters.

Inspect the holes, stitching, edges, and buckle every few weeks. Replace the belt when holes stretch, stitching separates, or the leather stays permanently curled. A fixed schedule is less reliable than inspection. The National Strength and Conditioning Association emphasizes equipment checks and progressive loading, which supports a practical rule: replace worn support before it changes your lifting mechanics. Take photographs of the belt’s holes every few months. Small damage is easier to notice in comparison.

How to Choose a Leather Weightlifting Belt in 2026? - How to Test Fit, Maintain, and Replace Your Weightlifting Belt

Decision Area What to Check Practical Range or Standard How to Test It Replacement or Adjustment Signal
Training Type Match the belt shape to the movements you perform most often. Olympic lifts generally benefit from a belt that allows hip and torso movement. Squats and deadlifts can use a broader, more supportive design. Perform an unloaded squat, front squat, deadlift setup, and overhead position while wearing the belt loosely. If the belt restricts hip flexion, receiving position, or breathing, choose a different profile or width.
Leather Thickness Check the leather thickness and stiffness. Approximately 4–6 mm is a common range for a durable training belt. Thicker leather usually feels stiffer and needs more break-in time. Press the belt by hand and bend it gently. It should resist collapse without feeling sharp against the ribs. Deep surface cracks, separated layers, or permanent soft spots indicate structural wear.
Belt Width Compare the width with your torso length and lifting style. A uniform 10 cm width offers broad support. A tapered design may be narrower at the front for better comfort during cleans and snatches. Place the belt between the lowest ribs and the top of the pelvis. Bend, brace, and sit into a squat without pinching. Change the size or profile if the belt digs into the ribs, presses into the pelvis, or prevents a full brace.
Length and Sizing Use your actual waist measurement rather than your trouser size. Measure around the area where the belt will sit while relaxed. The correct size should fasten near the middle holes, leaving room for normal weight changes. Measure after a normal exhale, then test the belt at the same position used during training. Avoid a belt that closes only on the last hole or cannot be tightened enough to stay stable.
Fit and Tightness The belt should support bracing without obstructing breathing. It should feel firm during a brace but should not cause numbness, sharp pain, skin discoloration, or restricted breathing. Take a deep breath, brace the abdominal wall, walk, hinge, and squat. The belt should remain in place without sliding. Loosen or reposition it if you cannot breathe normally between repetitions or experience persistent discomfort.
Buckle and Fastener Inspect the buckle, prong, rivets, stitching, and holes. A metal buckle should sit flat, and the prong should fully enter the selected hole without bending or excessive movement. Fasten the belt, apply moderate hand tension, and check that the buckle and prong remain aligned. Replace the belt if the buckle is bent, the prong is loose, rivets are lifting, or holes are stretched or tearing.
Initial Break-In Allow the leather to adapt gradually. Use it for warm-ups and moderate loads before relying on it for heavy sets. Avoid sharply folding the belt. Increase use gradually and check whether the belt develops comfortable flexibility without losing its shape. Do not forcefully roll, twist, or bend a stiff belt, as this can create premature creases and cracks.
Cleaning Remove sweat, chalk, and surface dirt after training. Wipe the leather with a slightly damp soft cloth, then dry it with a clean cloth. Clean metal parts separately. Inspect the inner and outer surfaces after each session, especially around the buckle and stitching. Avoid soaking, washing-machine cleaning, bleach, alcohol-based cleaners, and direct high heat.
Conditioning Protect the leather without making it excessively soft. Apply a small amount of leather conditioner only when the surface appears dry, following the product instructions. Test conditioner on a hidden area first and allow the belt to absorb it fully before use. Stop conditioning if the surface becomes greasy, sticky, excessively flexible, or difficult to grip.
Storage Control moisture, heat, and deformation. Store the belt flat or in a loose natural curve in a cool, dry, ventilated place. Keep it away from damp gym bags, radiators, car trunks in hot weather, and prolonged direct sunlight. Persistent mildew odor, discoloration from moisture, or a permanently distorted shape requires careful inspection.
Performance Check Confirm that the belt improves stability without changing technique. Use it for controlled warm-up sets before heavy work. It should support abdominal bracing while allowing consistent range of motion. Compare belt and beltless technique at a safe, submaximal load; stop if movement quality declines. A belt should not compensate for poor technique, pain, inadequate warm-up, or an unsuitable training load.
Replacement Timing Judge condition by safety and function rather than age alone. Replace it when structural damage affects secure fastening, fit, support, or skin safety. Check the entire belt before each training session and perform a detailed inspection regularly.
Fit principle: A leather weightlifting belt should feel secure and supportive while allowing normal breathing, bracing, and movement. Stop using it if damaged parts could release under load or if it causes persistent pain, numbness, or restricted movement.